Create your own….. “Quilter” a free standing 2 ft dimensional quilt. In this class you will learn how to illustrate with pen and ink on existing fabric and create a quilt totally “Out of the box” Instruction will be given on perfect raw edge applique and dimensional quilting.
This is a unique experience… and you don’t have to be able to draw, just trace.
Requirements
1 yard of good quality of black fabric.
1 yard of white fabric
1 yard of fabric for skin tone, look for a good quality batik.
½ yard each, cream fabric for her blouse, blue for her skirt, turquoise for her underskirt.
1 yard of green for her quilt.
½ yard of good quality white fabric for the quilt
1 fat quarter each fabric for her cake tray and cake.
10” square for her hair.
4 sheets of velum tracing paper 16” X 12” approximately. 2 yards of steam a seam lite (single) fusible web.
1 piece of thin cotton batting 2ft X 3ft
A Mechanical pencil.
.5 black pigment ink pen.
I will bring the pens and inks to to class you will so the shading with pen. Approximate cost per person is $30
Medium size cutting mat.
I know it's difficult, but it would be an advantage to have a small portable light box.
A see through teflon applique sheet if possible
Threads to match the colour of the quilt.
Machine in good order.
Darning foot with an open toe if possible (contact me)
open toe foot for appliqué
1 pkt Klasse or Schmetz 'Sharp' or microtex needles assorted.
How did this quilt come about...?
A friend designed this lady for our quilt, it is a group quilt and after it had been exhibited in Houston and beyond, I decided to create a class.
I guess you realise that you won't finish the quilt in the day....but you will get close in two days, however, you will have all the details, you can take photos and I will have great info for you to take home. Even a full size image in color.
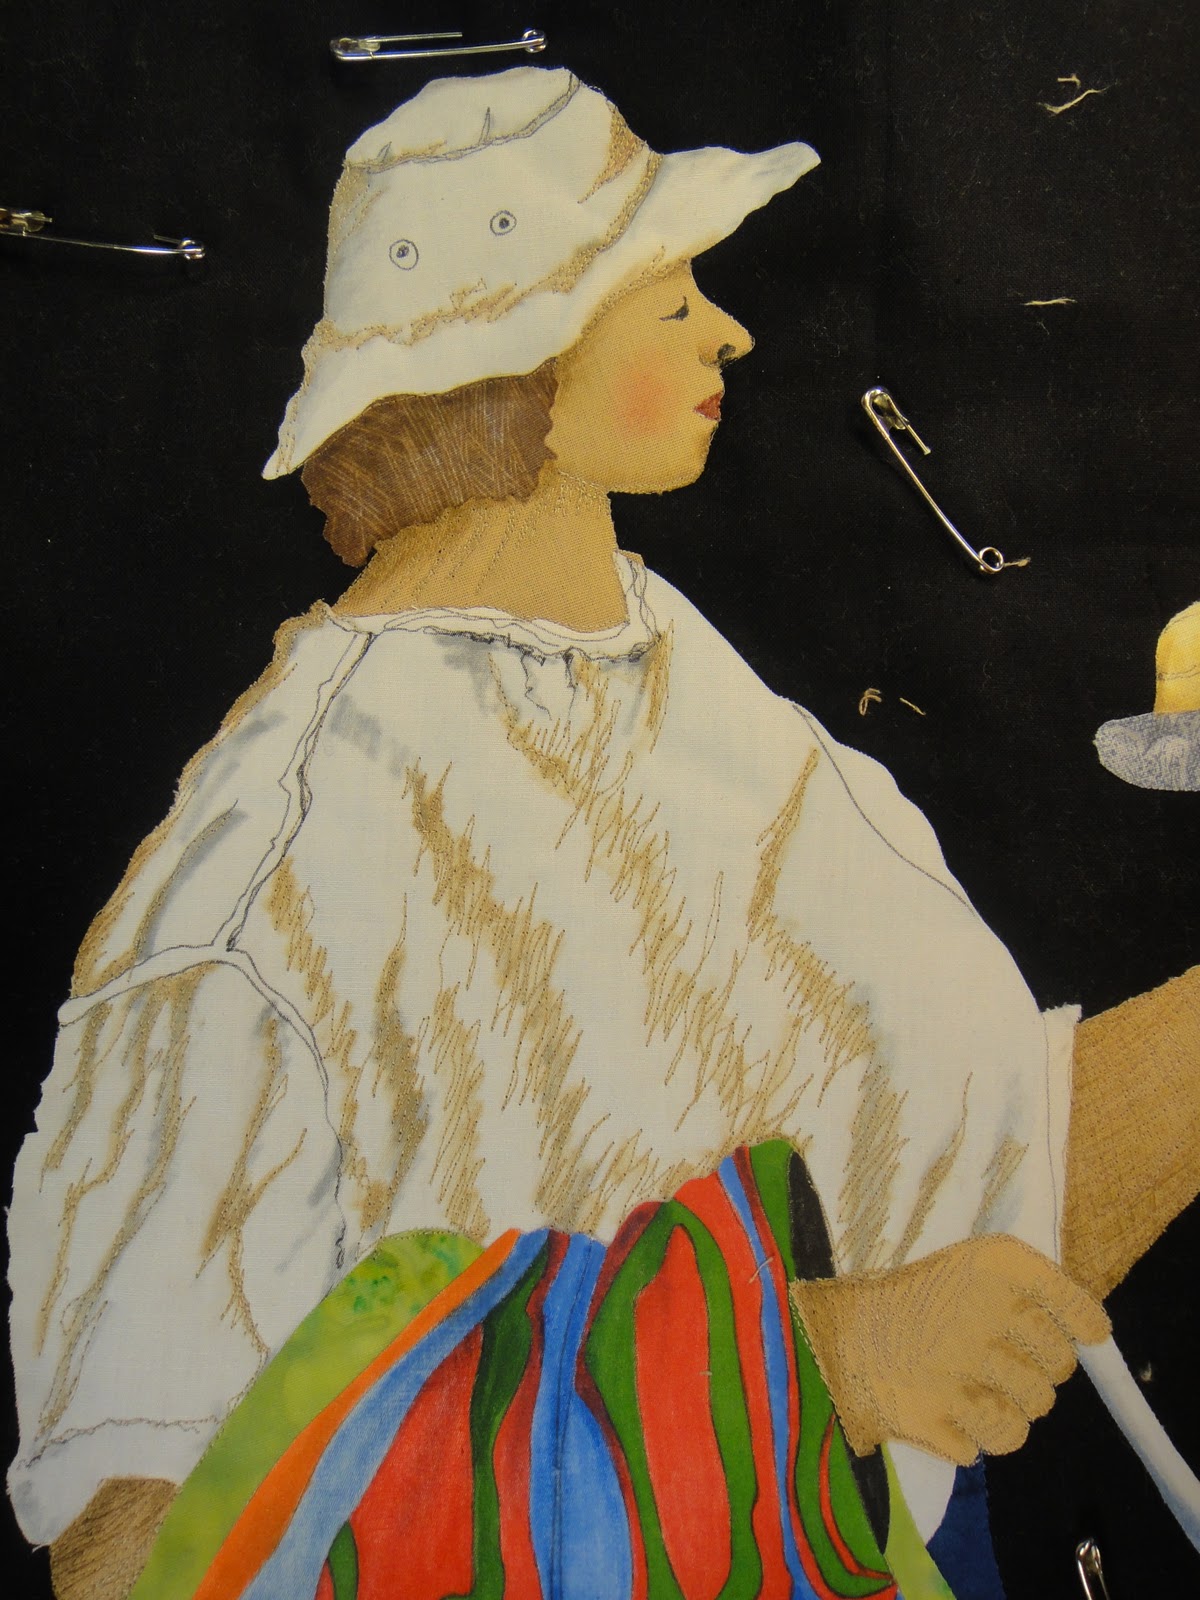
This is the back view so you can see I have changed the thread in the bobbin to match the thread on the top of the quilt.
You will learn all my techniques of applique, quilting and illustration...
This is one of the other ladies featured in the quilt. I love the scones in her basket.
Some of her friends
The complete quilt.
Some stages.....
I made another hand painted quilt today.
Sunday, working on the new sample... some of the quilting has been done.